End A Crochet Project
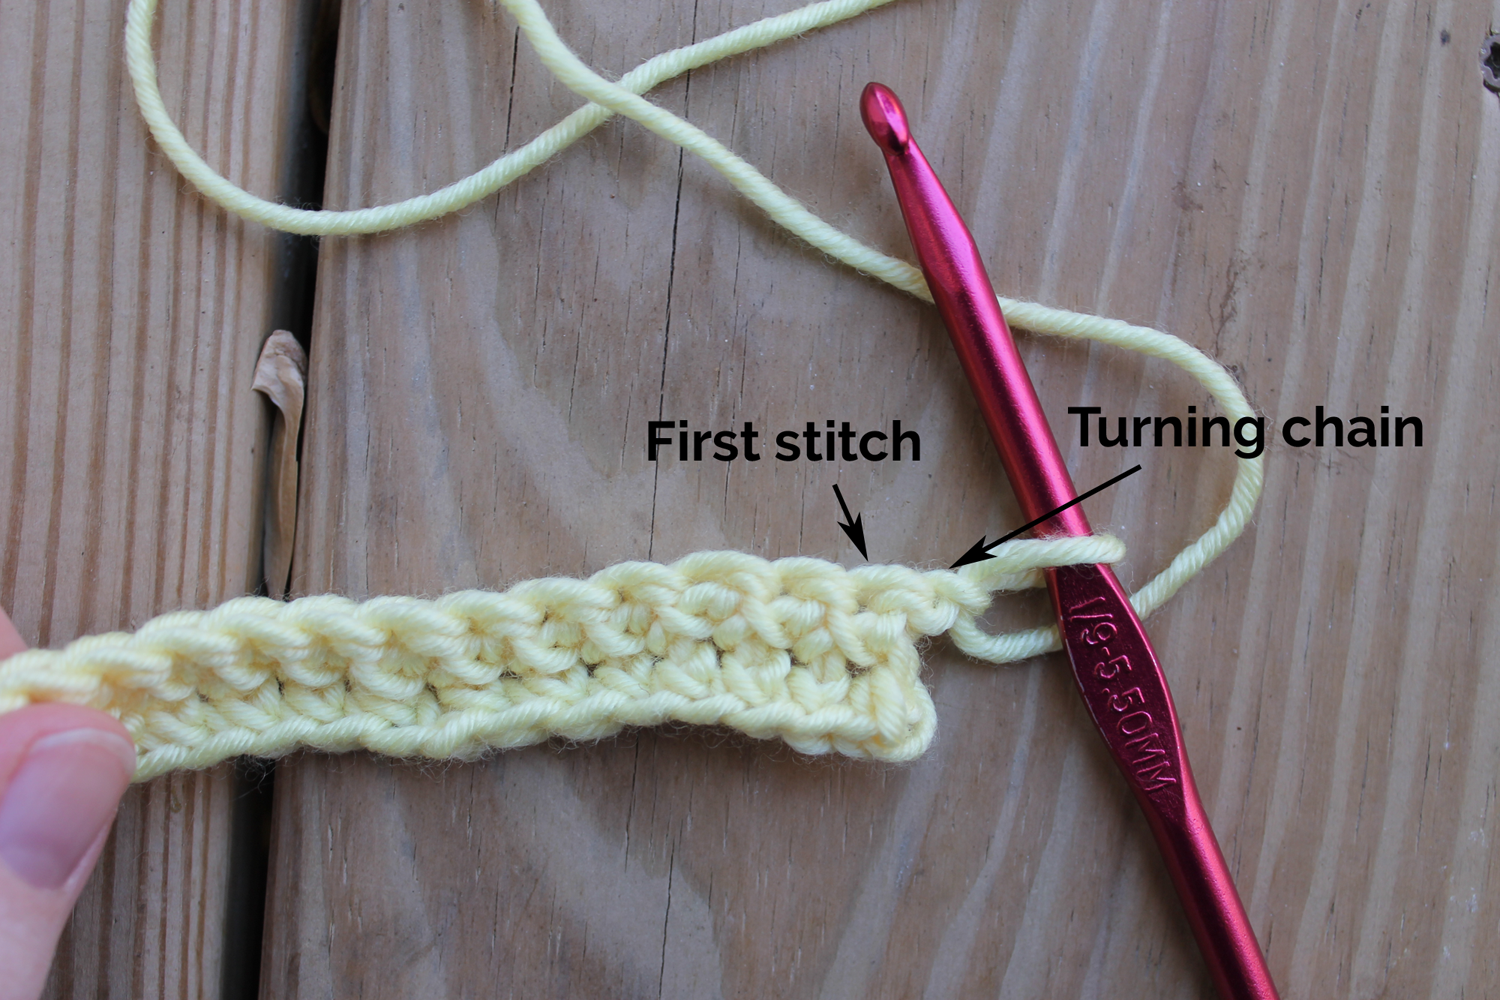
End A Crochet Project - This produces quality crochet edges for your afghans, granny squares, table decor, and so much more. Before you weave in the ends you will first need to bind off or fasten off. This video demonstrates a simple and easy technique to finish your project and keep it together. So you finished your first crochet project, congrats! I thought i'd share today on the blog my favorite way of weaving in ends for my crochet projects. But now how do you tie off the yarn in such a way as to keep the whole thing from unraveling? Pull it tight to prevent unravelling. Cut yarn, leaving 6 in tail. We'll walk you through it for both flat row and continuous round projects, plus teach you how to weave in the ends (even for amigurumi) and join new yarn if you want to switch colors or create a border. I have tested them all and use them frequently so i added a few tips to help you even more. In my last lesson i didn't cover this step. Web one of the basics of crochet is fastening off your working yarn and then weaving in your ends to secure the end of your crochet project. This will form a knot. Web this tutorial will explain how to bind off crochet like a pro. Web when you come to the end of a crochet project you need to tie it off properly or all of your hard work could come undone. I talk about different techniques for each part and even using different instruments to end off. So you finished your first crochet project, congrats! Web here is how to fasten off your yarn and weave in your ends. This produces quality crochet edges for your afghans, granny squares, table decor, and so much more. We'll walk you through it for both flat row and continuous round projects, plus teach you how to weave in the ends (even for amigurumi) and join new yarn if you want to switch colors or create a border. Web one of the basics of crochet is fastening off your working yarn and then weaving in your ends to secure the end of your crochet project. The term bind off is used to describe how you tie off your crocheting properly, making a seamless transition at. Pull it tight to prevent unravelling. This video demonstrates a simple and easy. Ready for that perfect finish? Fasting off secures the last stitch and prevents your crochet work from unraveling. Web january 18, 2018 / megan shaimes. Web when you come to the end of a crochet project you need to tie it off properly or all of your hard work could come undone. We'll walk you through it for both flat. You've finished your very first crochet project! Pull it tight to prevent unravelling. I thought i'd share today on the blog my favorite way of weaving in ends for my crochet projects. So you finished your first crochet project, congrats! This step by step tutorial shows you the process and includes a video tutorial too. Web january 18, 2018 / megan shaimes. Web at the end of a crochet pattern you might see something like this: Watch a short video demonstration of how. Web learn to finish your crochet project with the best weave in ends tools to make it fun & enjoyable. In short, all the hints and tips you need to be able. Web when you come to the end of a crochet project you need to tie it off properly or all of your hard work could come undone. The time and care it takes to knit a project will be wasted if the finishing is sloopy; Web learn to finish your crochet project with the best weave in ends tools to. The term bind off is used to describe how you tie off your crocheting properly, making a seamless transition at. We'll walk you through it for both flat row and continuous round projects, plus teach you how to weave in the ends (even for amigurumi) and join new yarn if you want to switch colors or create a border. Web. Pull it tight to prevent unravelling. What does ‘fasten off’ mean? This produces quality crochet edges for your afghans, granny squares, table decor, and so much more. This video demonstrates a simple and easy technique to finish your project and keep it together. There are two common ways to do this. Web how to bind off. You've finished your very first crochet project! This produces quality crochet edges for your afghans, granny squares, table decor, and so much more. Hide those loose ends by using a crochet weaving technique. Web how to finish a crochet project. This crochet tutorial explains how to weave in ends in 2 different ways that make the crochet or knit piece. Web let’s work these out together so your project can start being used instead of wait forever to be finished. You've finished your very first crochet project! Web the following methods are the most popular and trustworthy ways to weave. In my last lesson i didn't cover this step. Web let’s work these out together so your project can start being used instead of wait forever to be finished. Cut yarn, leaving 6 in tail. Web how to bind off. What does ‘fasten off’ mean? We will also look at how to work edgings on your crochet and how to join up all the separate pieces of your crochet. But now how do you tie off the yarn in such a way as to keep the whole thing from unraveling? I thought i'd share today on the blog my favorite way of weaving in ends for my crochet projects. So you finished your first crochet project, congrats! You'll learn the best way to weave in your ends so that they stay secure and don't unravel with wear or washing. Cut yarn, leaving 6 in tail. Fasting off secures the last stitch and prevents your crochet work from unraveling. The term bind off is used to describe how you tie off your crocheting properly, making a seamless transition at. Hide those loose ends by using a crochet weaving technique. Web when you come to the end of a crochet project you need to tie it off properly or all of your hard work could come undone. In short, all the hints and tips you need to be able to finish off your crochet items. This will form a knot. You've finished your very first crochet project! Ready for that perfect finish? This produces quality crochet edges for your afghans, granny squares, table decor, and so much more. Pull the hook straight up and keep pulling, creating a very large loop until the cut end of the yarn comes out of the stitch.
How to bind off and weave in ends crochet Itchin' for some Stitchin

How to Weave in Ends (Crochet) Crochet, Crochet instructions, Crochet

How to Finish Your Crochet Project Crochet Nerd
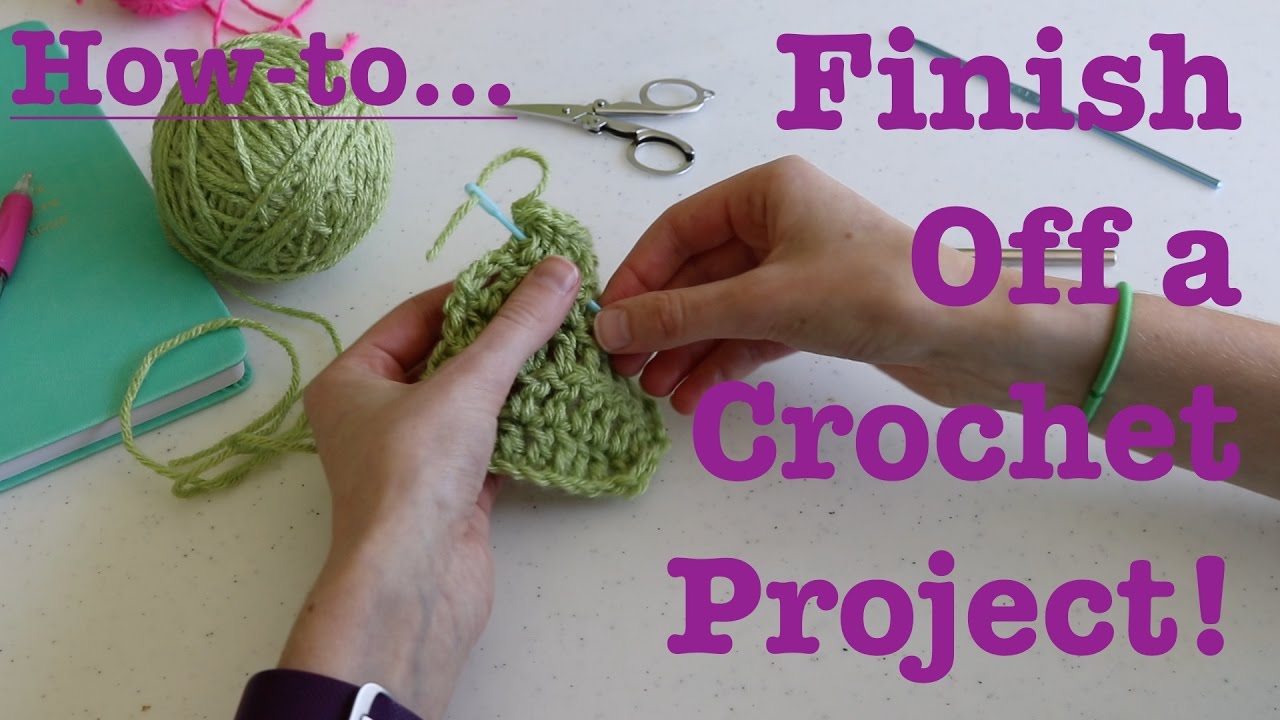
How to Finish Off a Crochet Project! Easy Tutorial YouTube

How to Finish Your Crochet Project Crochet Nerd

How to End a Crochet Project Crochet projects, Beginner crochet
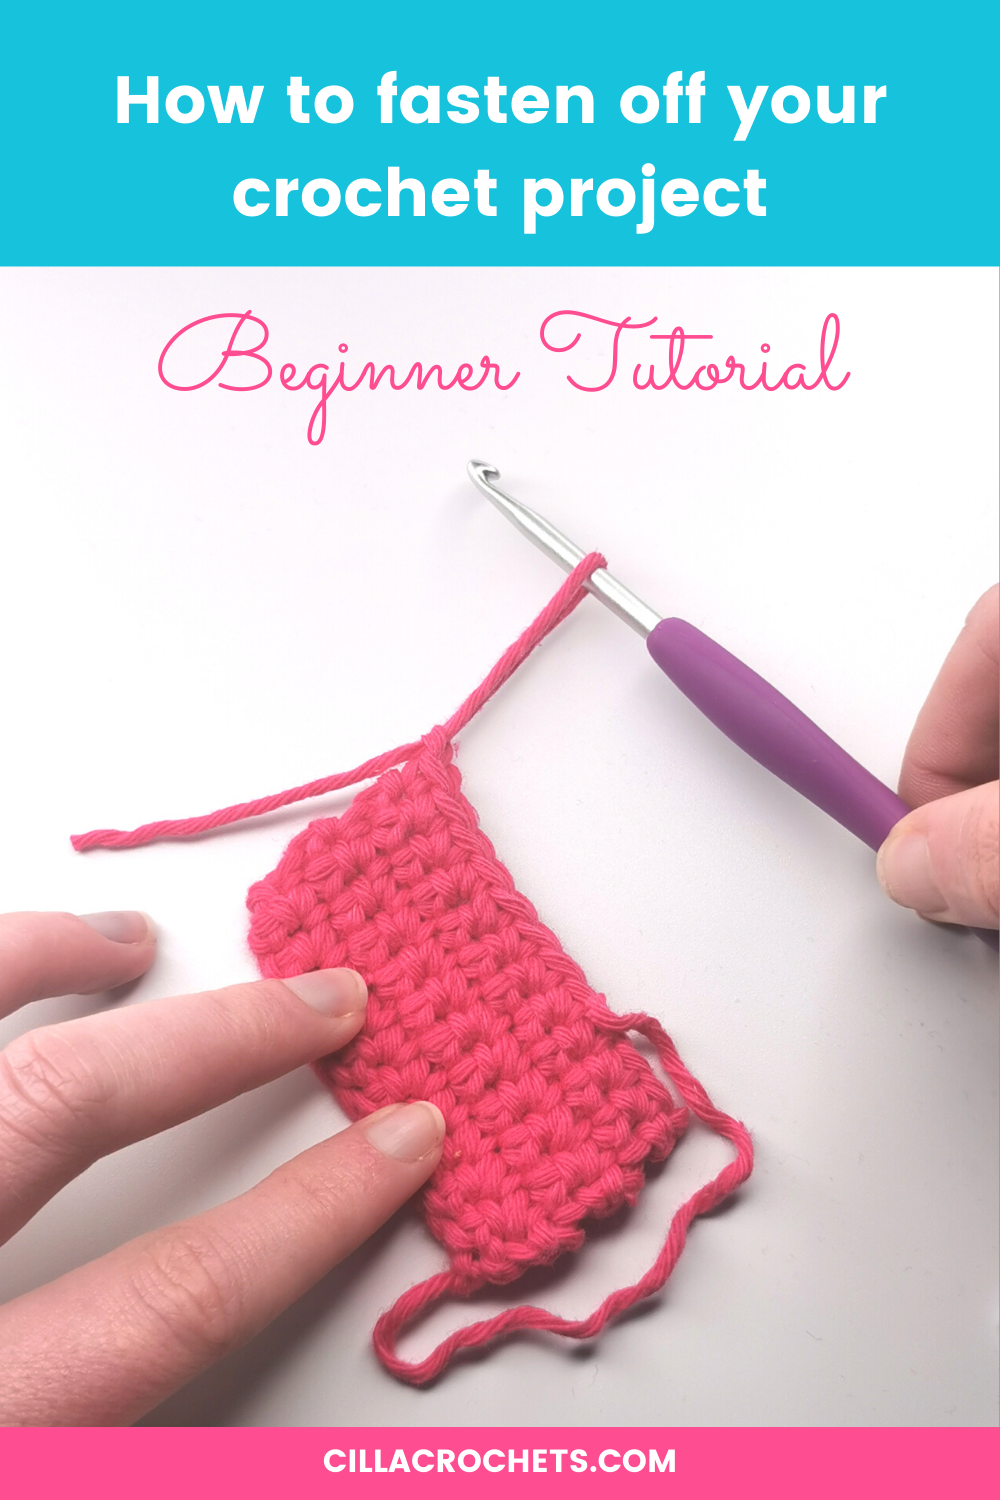
How to fasten off and finish your crochet project — Cilla Crochets

Crochet Finishing Don't Skip These 3 Steps TL Yarn Crafts
How To End A Crochet Chain Iwanna Fly

How to End a Crochet Project
I Have Tested Them All And Use Them Frequently So I Added A Few Tips To Help You Even More.
Web This Blog Post Has You Covered, Providing Clear Instructions On How To Professionally End A Crochet Project.
We'll Walk You Through It For Both Flat Row And Continuous Round Projects, Plus Teach You How To Weave In The Ends (Even For Amigurumi) And Join New Yarn If You Want To Switch Colors Or Create A Border.
I Talk About Different Techniques For Each Part And Even Using Different Instruments To End Off.
Related Post: